Getting started with mesheryctl
Introduction to Meshery
For all those who are unaware of Meshery, Meshery is a multi-service mesh management plane which provides users with service mesh operational best practices, lifecycle and configuration management, but also interoperates between various service meshes, while enabling you with the tools and knowledge to glean the most of out your service mesh performance, while keeping your overhead to a minimum.
Meshery's vision is to make the operating of any service mesh layer of cloud infrastructure simplified, and to hasten the inevitable, eventual, ubiquituous adoption service meshes as a pervasively present layer of any the way that any modern workload is designed and deployed. Meshery is created by the Layer5. Layer5 is a community-first, service mesh company which has technology partnerships with various tech giants like Microsoft, HashiCorp, CNCF, RedHat and many more to enlist. The community consists of open source leaders like maintainers of trending open-source projects, Google SoCers, Docker Captains, service mesh maintainers, Cloud Native Ambassadors and many more (join in!).
What is mesheryctl?
Meshery provides you with a clean, robust, streamlined command-line interface to manage and benchmark your service meshes, mesheryctl. With mesheryctl, not only you can manage your adapters & containers but you can also benchmark your mesh using the command line. mesheryctl provides support to a number of platforms so that we never miss out users. mesheryctl can be installed with a single bash command by simply executing:
$ curl -L https://git.io/meshery | bash -
in your terminal. You will see Meshery getting installed & fired up on port: 9081. You will see the output as
Extracting mesheryctl-v0.3.14...
Archive:  /Users/kush/meshery.zip
  inflating: LICENSE
  inflating: README.md
  inflating: mesheryctl

Installing mesheryctl in /usr/local/bin.
mesheryctl installed.
permissions moved to kush
Removing installation files and opening Meshery...Updating Meshery now...
Pulling meshery          ... download complete
Pulling meshery-istio    ... done
Pulling meshery-linkerd  ... done
Pulling meshery-consul   ... done
Pulling meshery-octarine ... done
Pulling meshery-nsm      ... done
Pulling meshery-cpx      ... done
Pulling watchtower       ... done
and you will be able to see the Meshery UI on https://localhost:9081.
If you are wondering if bash is only way to get mesheryctl, then here is the list of platforms which you can get mesheryctl describing all the different ways to get it.
| Platform | Supported? |
|---|---|
| Docker | ✔️ |
| - Docker - Docker App | ✔️ |
| Kubernetes | ✔️ |
| - Kubernetes - AKS | ✔️ |
| - Kubernetes - Docker Desktop | ✔️ |
| - Kubernetes - EKS | ✔️ |
| - Kubernetes - GKE | ✔️ |
| - Kubernetes - Helm | ✔️ |
| - Kubernetes - Minikube | ✔️ |
| - Kubernetes - OpenShift | In Progress |
| Linux | ✔️ |
| Mac | ✔️ |
| - Mac - Homebrew | ✔️ |
| Windows | ✔️ |
| - Scoop | ✔️ |
| - WSL2 | ✔️ |
| Raspberry Pi | In Progress |
We believe we have not missed any of the popular platforms for what it’s worth, we will be rolling out support for RaspberryPi and OpenShift soon 🎉🎉🎉.
If you are thinking about the requirements you would have to run mesheryctl, so to your surprise, to successfully run mesheryctl you will only need :
| a running Docker daemon |
Into the MesheryCTL
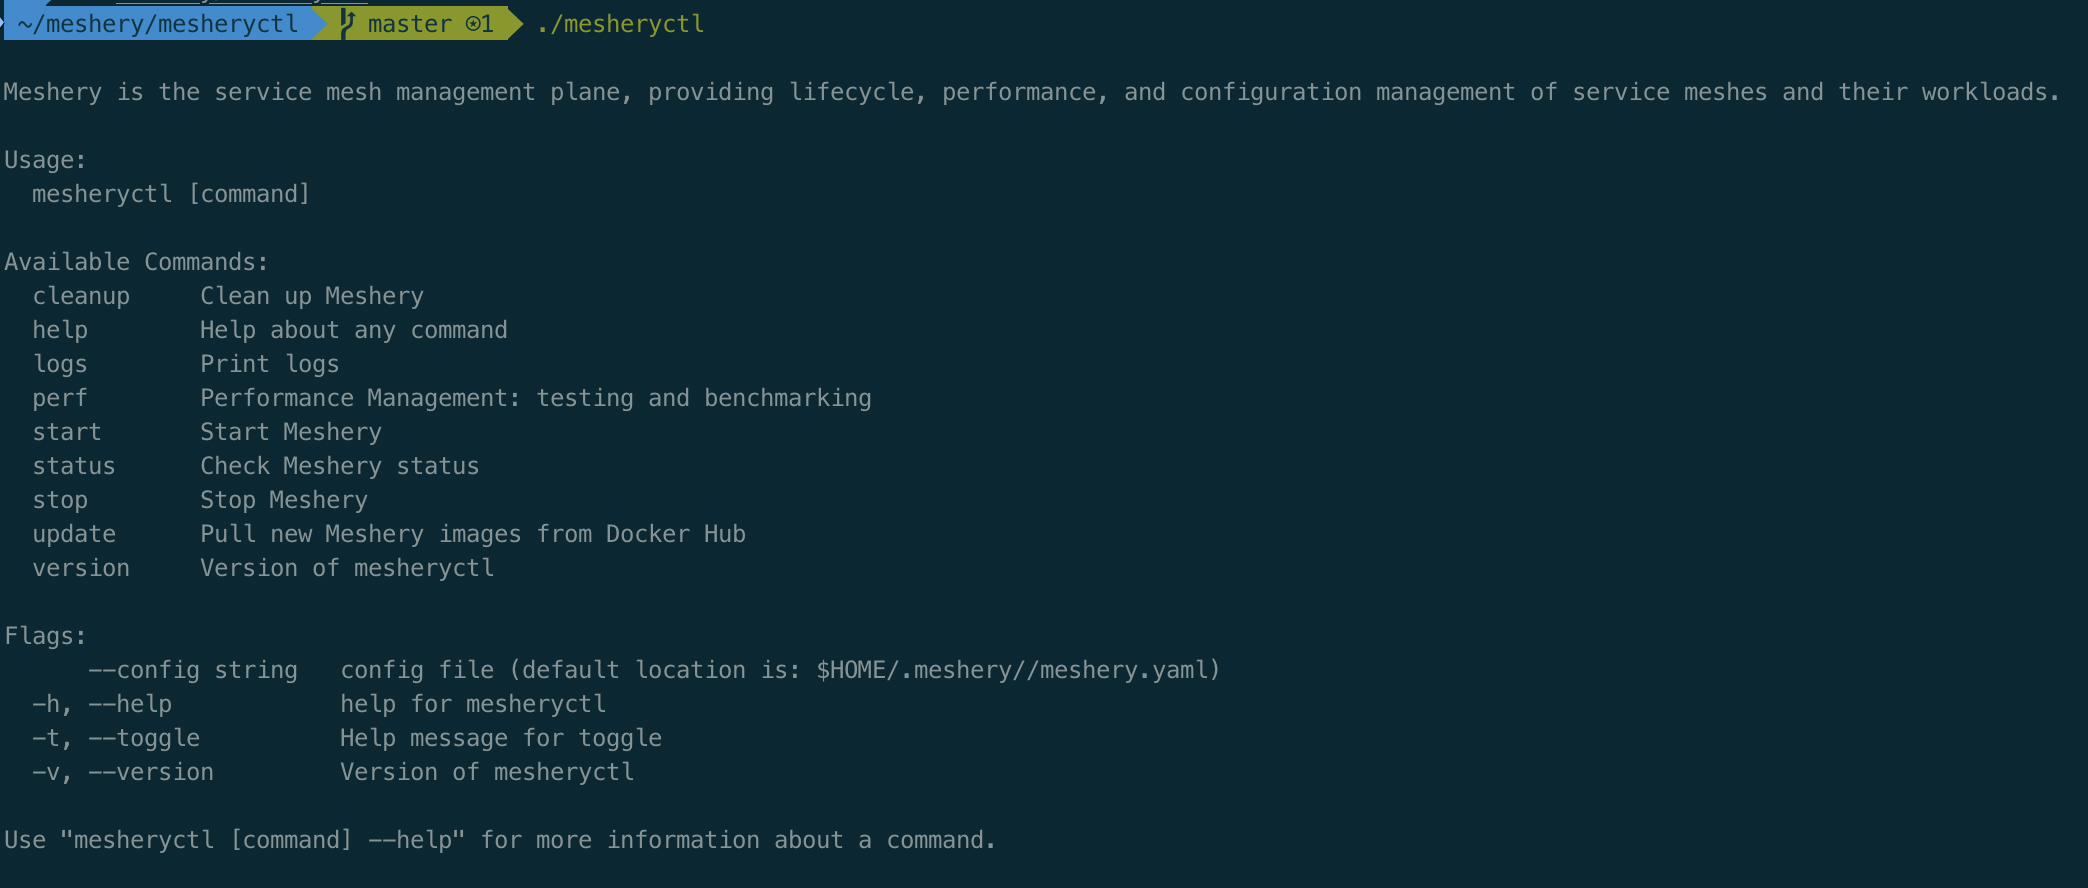
Once you have successfully installed, you will be having the power of a new CLI Command MesheryCTL. As you type mesheryctl into your terminal, you will be shown with the various sub-commands and flags mesheryctl can support.
Meshery is the service mesh management plane, providing lifecycle, performance, and configuration management of service meshes and their workloads.

Usage:
  mesheryctl [command]

Available Commands:
  help        Help about any command
  perf        Performance Management
  system      Meshery Lifecyle Management
  version     Print mesheryctl version


Flags:
      --config string    config file (default location is: $HOME/.meshery//meshery.yaml)
  -h, --help            help for mesheryctl
  -v, --version         Version of mesheryctl

Use "mesheryctl [command] --help" for more information about a command.
Once you do mesheryctl system start, Meshery will pull its adapters and latest docker images. Meshery will also detect your Kubernetes configuration and will let you know if Kubernetes is running. Meshery will run it’s web-based user interface on localhost port 9081 and will let you select your choice of Provider before you can start managing your service meshes with this powerful utility.
One of the most interesting sub-commands of mesheryctl is perf. |
The perf subcommand enables you to being managing the performance of your service mesh deployment and your workloads running atop of them. It lets you benchmark your service mesh without using the Meshery UI from the command line interface itself. Once you type mesheryctl perf, it will present you with all the powerful flags you can control with CLI, including providing it with a --file flag that points to any of a number of performance test profiles that you may have saved.
Performance Management and Benchmarking using Meshery CLI.

Usage:
  mesheryctl perf --[flags]

Available Flags for Performance Command:
  name[string]                  (optional) A short descriptor to serve as reference for this test. If not provided, a random name will be generate.
  url[string]                   (required) URL endpoint to send requests.
  duration[string]              (required) Length of time to perform test (e.g 30s, 15m, 1hr). See standard notation https://golang.org/pkg/time/#ParseDuration
  load-generator[string]        (optional) Name of load generator to be used to perform test (default: "fortio")
  mesh[string]                  (optional) Name of the service mesh to be tested (default: "None")
  provider[string]              (required) Choice of Provider (default: "Meshery")
  concurrent-requests[string]   (optional) Number of parallel requests to be sent (default: "1")
  qps[string]                   (required) Queries per second (default: "0")
  file[string]                  (optional) file containing SMPS-compatible test configuration. See https://github.com/layer5io/service-mesh-performance-specification
  help                          Help for perf subcommand

url, duration, concurrent-requests, and qps can be considered optional flags if specified through an SMPS compatible yaml file using --file
An example usage of mesheryctl perf --[flags] can be
mesheryctl perf --name "a quick stress test" --url http://192.168.1.15/productpage --qps 300 --concurrent-requests 2 --duration 30s --token "provider=Meshery"
You can also provide a SMPS Configuration file with perf subcommand, with this file provided you will not have to specify url, duration, concurrent-requests & qps. However, if specified the value provided through file will be over-rided by value through CLI. For more info about file configuration, see here.
mesheryctl perf --name "a quick stress test" --file {path}/smp.yaml --token "provider=Meshery"
What's next?
Meshery is an ever-growing community with attracting contributors from across the globe. We always have a role for everyone whether to be a code-writer, a community manager or a marketer. Layer5 community is always open to welcome you warmly.
If this makes you excited, join the Layer5 community with just a click & someone will be there to make sure you do not get missed.
Stay meshy and happy meshing!